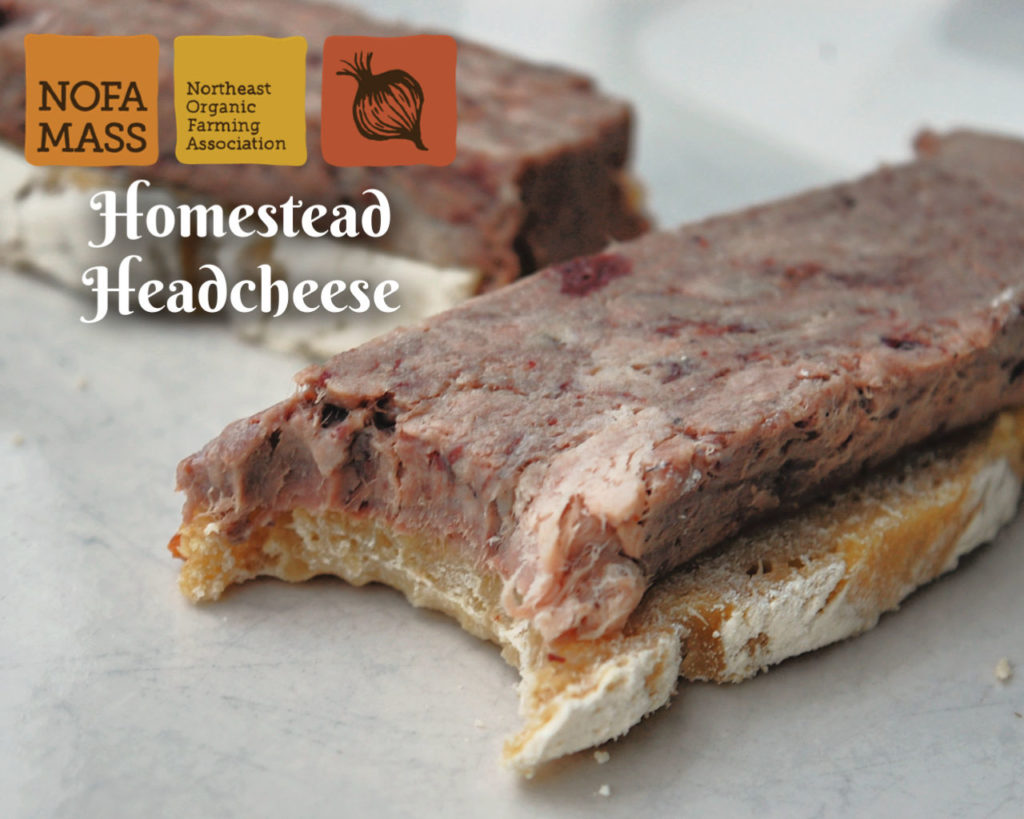
Homestead Headcheese
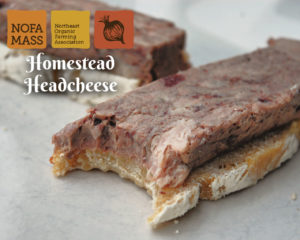
Jack’s Homestead Headcheese

F.O.O.D.  Focus on the Organic Difference
vol. 7  11/30/18

By Christy Bassett for The Organic Food Guide and NOFA/Mass

This past weekend we processed our four pasture-raised heritage breed hogs.  It is always a sobering experience to take a life- especially one that you have interacted with and nurtured daily for months.

But besides the mental hurdles that a homesteader who raises their own livestock for food must overcome, the butchering and preservation of the animal is a physically exhausting one.  These pigs weighed in at varying sizes, but with an average hanging weight of over 100 lbs per half, it took four of us two full days to portion out all of the meat, bone, fat and organs.  And then there is the processing of fat into lard, the bones into stock and, of course, the head into headcheese.

“Of course?”, you ask?  Well, yes, of course.  Because we wouldn’t want any of that organically and humanely raised animal to go to waste.  Plus, it is relatively low impact to make and highly nutritious to eat.  Headcheese is made from the head of a pig.  After cooking the head overnight, the meat, fat and gelatin can be easily removed and formed into a loaf which slices beautifully the next day.  Just like cheese.
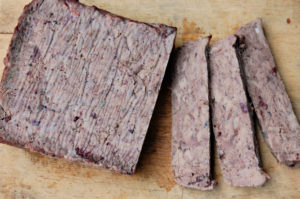
Slice evenly with a sharp knife for best results

This year, I tried a recipe from Jack Kittredge’s archives.  You may remember from a previous article on The Organic Food Guide that Jack is the co-farmer at Many Hands Organic Farm in Barre, MA as well as the editor of The Natural Farmer and the previous man behind the helm at NOFA/Mass’s Organic Food Guide.  If anyone knows how to utilize all edible parts of something homegrown, plus make it palatable, it’s him.  I served mine on homemade Einkorn sourdough.  (Anybody want that recipe too?  Let me know and it may be featured in a future edition of Focus on the Organic Difference.)
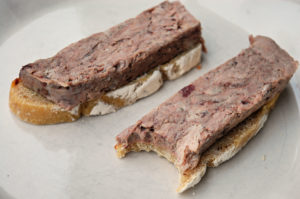
Headcheese on Einkorn sourdough bread

Ingredients

1 Pig’s head
1 Tbs vinegar
Sea salt
Black pepper
3-4 gallons water

Supplies           

waxed paper
2 bread pans
1 brick

I brought our pig’s head inside to shave it in the kitchen sink. Here she is, half polished.

“I’m not sure how many NOFA/News readers remember the original SPAM, a brand named canned pork loaf. It was pretty ubiquitous in the 1950s and was, I guess, one more of those new exciting products science and technology were going to bring us, lucky us. You could cut a slice of it off like sandwich meat, fry up a chunk like a burger, or eat it right out of the can without formalities if you were homeless or otherwise temporarily without benefit of a kitchen. I’m sure it’s still around, although it has been given a bad name by more recent information technology.

SPAM, as far as I can tell, is simply the industrial version of an old folk food, headcheese.

Although we have raised organic pigs for a number of years, this is the first fall I made headcheese. Julie and I had just done a practical skills workshop on preserving food and I was feeling self-confident and like we should press the envelope. I’m glad I did. Headcheese is a simple, delicious, practical and flexible food. If you raise pigs or buy one from a farmer each fall, it should also be virtually free.

I had to remove the ears to get our pig’s head to fit into our 4 gallon stock pot.

Directions

1)  Boil the pig’s head in water and vinegar (to leach out calcium from the bones) for at least 12 hours.

(This may be the hardest part for some. We use a 5 gallon pot on our wood stove, and our pigs’ heads are sawn in half right between the eyes. Even so, the 2 halves barely fit in the pot.)

2) Separate out the meat.

(This will be the other hard part. There is a surprising amount of meat in a head  — tongue, cheek muscles, eye muscles, etc. After boiling for 12 hours the bones come out clean but muscle, fat and skin are all mixed together. Once the mix cools to manageable temperatures, pick up a paring knife, roll up your sleeves and go to work. If you think about it, you can actually find many interesting things to muse upon and discuss with your children. The tongue, for instance, had a tough but easily stripped off membrane like a chicken’s gizzard which allows this essential muscle to encounter all sorts of hazards without damage to its own soft tissues. The eyeballs are connected by tendons to small muscles that allow them to work together to focus. I guarantee that if you discuss and show these things to your children [and if they are under the age of adolescence] they will not feign disgust but be really interested and oh so glad you are finally talking to them about nature, as it is!)

3) Finely chop the meat

(No special message here, except don’t be too careful to eliminate all the fat from the meat. Many headcheese tissues are complex combinations of muscle, integument and fat. A certain amount of fat is necessary as a binding agent in the loaf, so err on its side. My first loaf was picked clean for meat and wouldn’t hold together when cut into slices.)

4) Salt and pepper to taste

(Remember, you may be eating this in a sandwich without opportunity to season to your taste. So do it now, before forming the loaf.)

5) Form the loaf

(Line a bread pan with waxed paper and spoon the fatty chopped meat into the pan. Compress the mix with the back of the spoon and when it is all there fold the waxed paper liner over the top of the pan.)

6) Compress the loaf

(Set the 2nd bread pan on top of the first and put a brick in it. Set the stack in the refrigerator and let it congeal. After a day of compression, it can be frozen for later or used while fresh.)

Congratulations! You have just taken what would be considered a waste product in many parts of our culture and gotten real value out of it. Plus, you have given the rest of the head (bones, fat, skin) to your dogs – or your neighbors dogs – who need to put on weight in the fall if, like ours, they are required to stay outside all winter and guard the livestock. I can assert that Jimbo is quite used to this natural seasonal change and seems to enjoy it and not even question his responsibilities under the deal.”
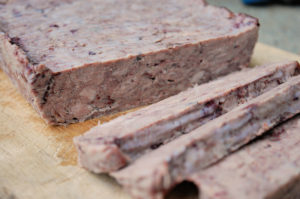
Store refrigerated, or freeze slices individually.

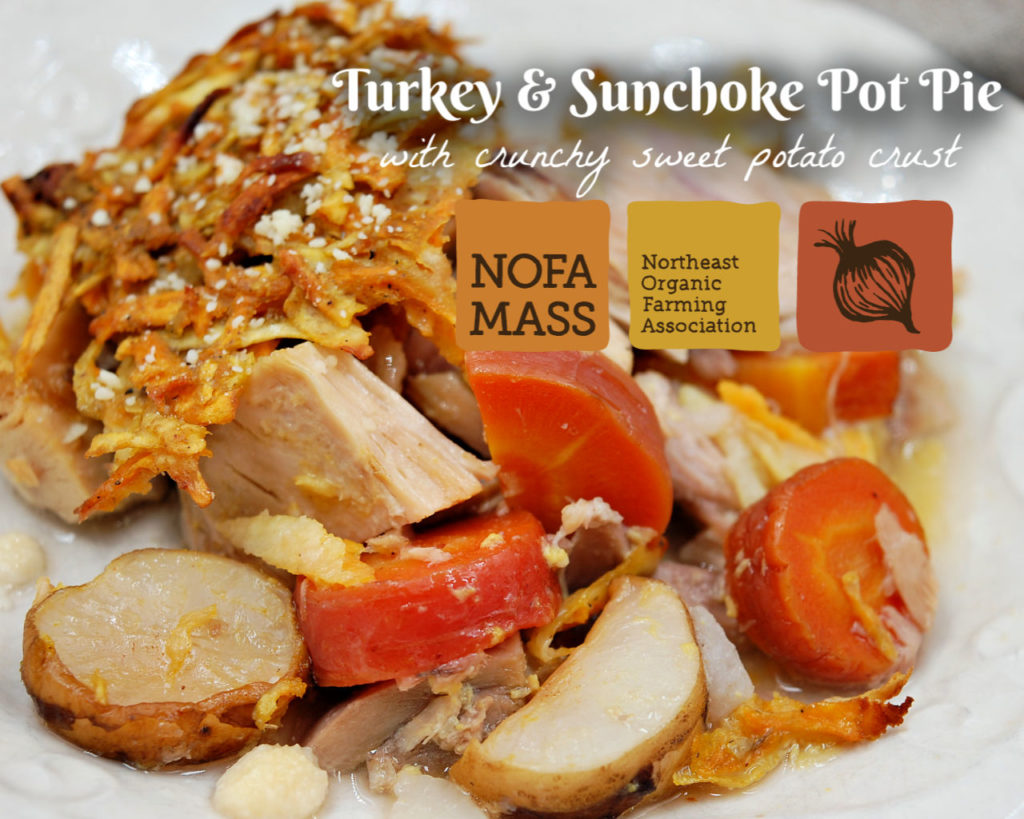
Turkey & Sunchoke Pot Pie with Crunchy Sweet Potato Crust

Turkey & Sunchoke Pot Pie with Crunchy Sweet Potato Crust

F.O.O.D. Focus on the Organic Difference
vol. 6  11/23/18

By Christy Bassett for The Organic Food Guide and NOFA/Mass

I was first introduced to sunchokes by accident.  Well, actually, it was more a matter of them being thrust on me than a gentle discovery.  In the early days of my local food crush, I saw an ad for someone selling horseradish root from their backyard garden.  Being new to gardening and having a few empty beds to fill, I made the hour drive to pick some up.

When I arrived at the suburban neighborhood, I was surprised to see a man standing in his driveway, digging along his white picket fence, dividing tubers in the two-foot section of soil between pavement and plastic.  He waved me in, greeted me with a gritty grip, and handed me a box of horseradish.  As I stood there making small talk with him, I was in awe of how much food he was growing in his tiny lot and how much joy he seemed to take in gardening.  His neighbors clearly did not share the same interest; their landscaped lawns trimmed short and lined with annuals blooms.

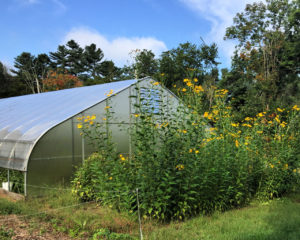
But the plot was not only productive, it was truly beautiful.  Tall yellow flowers shaded the place we were standing and created an extra layer of privacy between his house and the next.  I asked about these plants, guessing they were a type of sunflower meant for decoration only.  It was then that the man pointed to the basket of tubers he had been collecting from the ground beneath these towering blossoms.

photo courtesy Laura Davis of Long Life Farm, Hopkinton, MA

“Every had a Jerusalem artichoke?” he asked.  I hadn’t.  And these didn’t look anything like the artichokes I had seen in the store.  “Here, take some!  I have more than I know what to do with and nobody else in my family eats them.”

“Should I plant them or eat them?” I wondered.

“Both- plenty there to have a taste and save some too.”  He handed me the basket and turned away to continue his work.

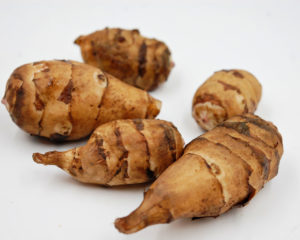
Sunchokes are a thin-skinned tuber with a nutty taste and crisp texture.

And with that, I was the bewildered new owner of 5 lbs. of Jerusalem artichokes (also known as sunchokes) that I had no clue how to handle.  The planting story is one to tell for another day, but after a bit of research, I discovered that preparing them for eating can be a bit tricky too.  You see, sunchokes have another charming nickname that the man neglected to tell me.  Fartichokes.

As it turns out, sunchokes have a high amount of a polysaccharide called “inulin” in them.  Inulin has actually gained some popularity as a prebiotic supplement to improve gut health.  Read more about the health benefits of inulin here.  But the problem with it is that the human body cannot digest inulin, and when eaten in large amounts, the bacteria in the lower intestine breaks it down, producing methane in the process.  Resulting in an uncomfortable and embarrassing side effect.

Not to worry, dear friends, there is a solution.  Just boil your sunchokes in an acid solution (like lemon juice or vinegar) to break down the inulin into digestible fructose and glucose.  No more school yard name calling for these underappreciated roots.  And then you can use them as a replacement for starchy potatoes in this tasty comfort food favorite.

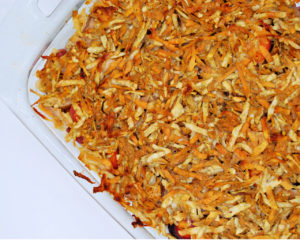
This grain free sweet potato crust provides just the right amount of crunch to compliment the savory filling.

Ingredients

For the pot pie:
4 cups cooked, shredded, pasture raised organic turkey
2 cups chopped organic carrots
2 cups chopped organic sunchokes
1 cup organic lemon juice
1 cup water
1 small organic leek
4 cups organic turkey stock
2 Tbs arrowroot powder dissolved in ½ cup water
2 tsp organic garlic powder
2 tsp sea salt

For the crust:
3 medium organic sweet potatoes, peeled and grated
1 pasture raised organic egg
2 tsp sea salt
1 tsp black pepper
½ tsp rep pepper flakes
Organic parmesan cheese for dusting, if desired

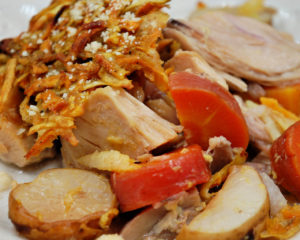
Eat fresh out of the oven to enjoy this crispy texture and moist gravy.
Directions

For the filling

  • Preheat oven to 350 degrees F
  • Combine 2 cups lemon juice with 1 cup water in a medium saucepan.  Bring to a boil and add chopped sunchokes.  Cover with a lid and simmer for 2-3 minutes.  Add chopped carrots (it’s okay if they are not completely submerged in lemon juice solution), replace the lid and continue to cook for another 5 minutes.  Strain sunchokes and carrots through a wire mesh colander and allow to cool.  Discard lemon juice.  (This makes a tasty treat for your chickens if you soak their feed in it overnight!)
  • While sunchokes and carrots are cooking, heat turkey stock in a small saucepan over medium high heat.  Bring to a boil, then add arrowroot powder/water solution and bring to a boil again to thicken.  Simmer until it reaches a gravy-like consistency and season with garlic powder and sea salt.
  • Add cooked turkey, sunchokes, carrots and leeks to a large bowl.  Stir to combine, then lay in a 9×13” baking dish in an even layer.
  • Pour gravy over the meat and vegetables evenly.

For the crust

  • Place shredded sweet potato in a clean lint-free towel and squeeze out as much moisture as you can.  Add the dried sweet potato shreds to a large bowl.
  • Whisk the egg with sea salt, black pepper and red pepper flakes.  Add to bowl with sweet potato and mix well.
  • Spread the sweet potato and egg mixture over the filling in an even layer.  Sprinkle with Parmesan cheese, if desired.
  • Bake at 350 degrees for 30 minutes.  Turn up the temperature to 450 degrees and bake for another 10-15 minutes, until top is browned and crunchy.


Maple Cardamom Carrot Cake with Cream Cheese Frosting

Grain Free Maple Cardamom Carrot Cake with Cream Cheese Frosting

F.O.O.D. Focus on the Organic Difference
vol. 5  11/16/18

By Christy Bassett for The Organic Food Guide and NOFA/Mass

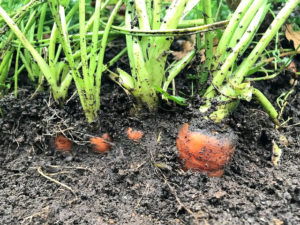
Pulling carrots from the ground is one of my all time favorite gardening activities.  The bright green tops waving in the wind like a flag declare that there is more than meets the eye beneath the surface.  I grasp each banner individually, visualizing the hefty root that will be uncovered when I finally tug it free from the soil.

I know you’re in there, carrots…

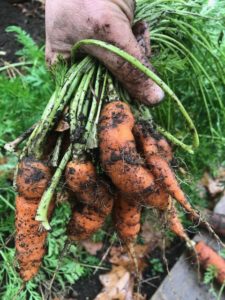
More often than not, my ideas of carrot bounty are not quite actualized, since I never tend to thin them properly or pay close enough attention to the garden as they are growing.  The slender threadlike root stares back at me as I decide whether it is worth bringing into the kitchen or handing straight to the goats.  But, sometimes, the size of the prize exceeds my expectations.  It is a psychological rush to be rewarded with the occasional jackpot when you are bracing yourself for disappointment.

Gotcha

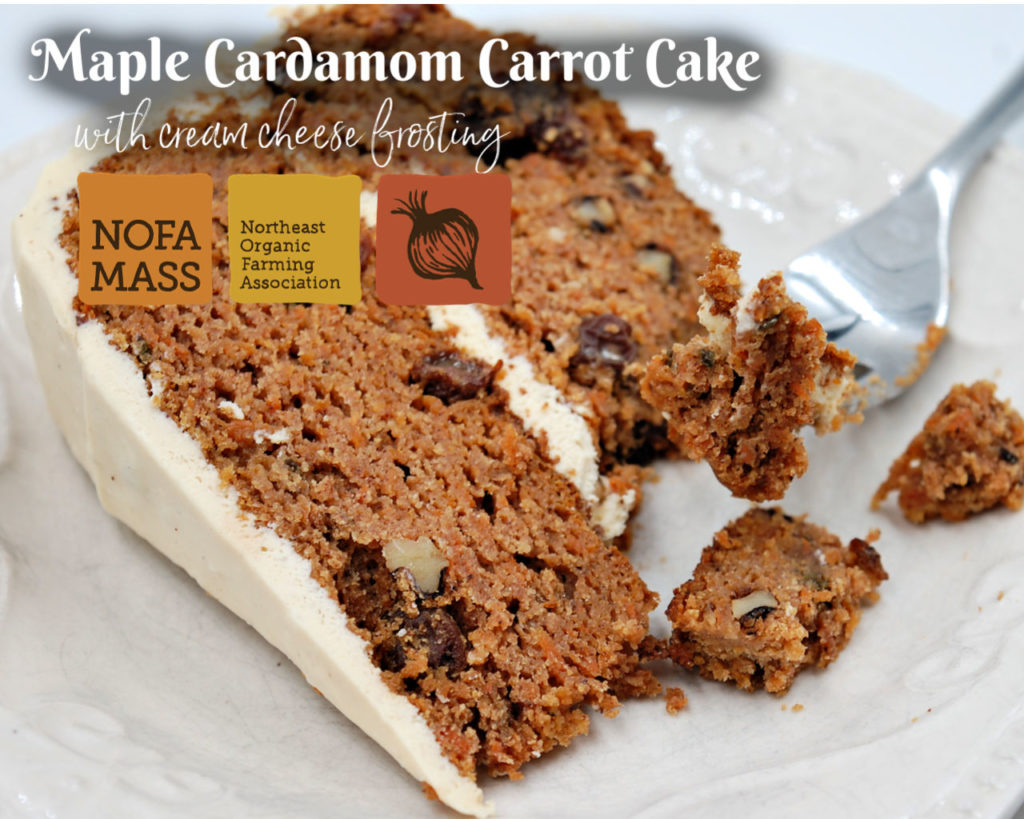
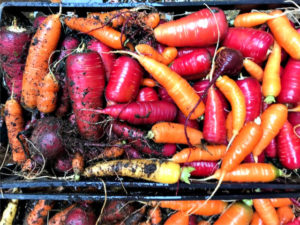
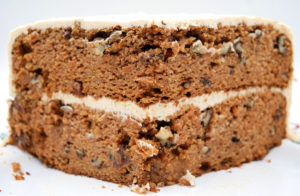
This year, our organic rainbow carrots were the stars of show.  Likely due to Mother Nature keeping the ground continually moist and NOFA/Mass enlightening us on soil amendments, we seem to have struck it rich in root vegetables.  I’m not complaining.  When life gives you carrots, make carrot cake.  Especially if it is this grain-free, organic, Scandinavian spiced, version of carrot cake.

Rinsing the dirt from these beauties was so gratifying.

Ingredients

Dry ingredients:
1 cup almond flour
1 cup coconut flour
¾ cup tapioca starch
1 ½ Tbs cinnamon
1 tsp nutmeg
½ tsp cloves
½ tsp cardamom
1 Tbs baking soda
4 cups shredded organic carrots

Wet ingredients:
1 cup maple syrup
1 cup organic applesauce (unsweetened)
8 large (or 12 small) organic, pasture-raised eggs, beaten
½ cup virgin organic coconut oil, melted
2 tsp vanilla extract
2 tsp organic apple cider vinegar
1 cup chopped organic walnuts
1 cup organic raisins

For the frosting:
16 oz organic cream cheese (best if you make it yourself!), at room temperature
1/4 cup virgin organic coconut oil, melted, but not hot
1/4 cup maple syrup
1/4 tsp cinnamon
1/4 tsp cardamom

This moist, double layer cake will serve 16-20 guests.

Directions

  • Preheat oven to 350 degrees F
  • Grease two 9” round cake pans
  • Combine dry ingredients in a large mixing bowl, adding shredded carrots last, tossing to coat.
  • In another bowl, mix wet ingredients together with a whisk. Then add to dry ingredients and stir well.
  • Add walnuts and raisins, dispersing into batter without overmixing.
  • Divide the batter evenly into the two greased cake pans. Bake for 50-55 minutes, or until the top is firm and an inserted toothpick comes out clean.
  • Remove from oven and allow to cool until you are able to handle the pans without burning yourself. Turn the pans upside down to release the cakes and allow to cool completely on a wire rack.
  • To make the frosting mix the room temperature cream cheese in a stand-up mixer until smooth. Add the melted, but not hot, coconut oil and maple syrup.  Mix at low speed until incorporated, then whip until fluffy.
  • Spread an even layer of frosting on one cake, then place the second cake on top. Frost the cake as a whole.

DIY Vegetable Bouillon Powder with Dandelion Forest

F.O.O.D. Focus on the Organic Difference
vol. 4 November 9, 2018

Profile and recipe from Chris Samoiloff of Dandelion Forest, Princeton, MA
By Christy Bassett for The Organic Food Guide and NOFA/Mass

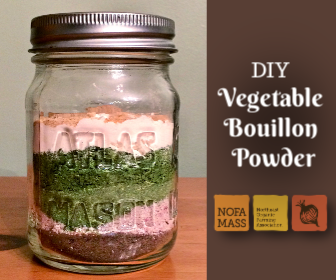
This week on the FOOD blog, Chris Samoiloff of Dandelion Forest in Princeton, MA shares her original recipe for homegrown and homemade vegetable bouillon powder.  (Hint: it’s vegetarian, low sodium and preservative free!)

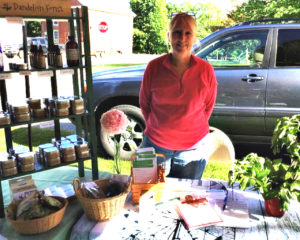
Chris is a gardener, herbalist and small business owner in Central Massachusetts.  She is passionate about growing and using organic herbs and vegetables for the health of her family, clients and the environment.  Follow her on Facebook at facebook.com/dandelionforestorg/ or visit her website, dandelionforest.org for tips on growing, harvesting and using medicinal herbs.  You can also visit her farm stand at 29 Matthews Lane, Princeton, MA.  Call to reserve products and for availability, including eggs.  She is a pick-on-demand farm to ensure maximum nutrients in her products. chris@dandelionforest.org, or via text – (508) 769-8217.

Are you a farmer, gardener, homesteader, consumer, landscaper or food activist?

I consider myself an herbalist/permaculturist (“herbaculturist”) who is very focused on growing food and medicine to heal the body and prevent disease for both humans and the planet. I am not certified organic, but I don’t use any chemical fertilizers or pesticides on my property.

What type of food to do grow, if any?  Do you sell it and where?

I grow regular garden produce for the family but I’m focused on herbs, continually adding more medicinals to my property. I have started a permaculture orchard, but it’s young and just starting to produce, although it has an abundance of comfrey, yarrow, apple mint, and valerian. I use most of my herbs to make teas and herbal extracts and I sell them at farmer’s markets, local fairs, and via pick-up/delivery. I have some of my products at Dandelions in Barre, MA and Mountainside Market in Princeton, MA. My dream is to have a pick-on-demand herbal farm, for both medicine and transplants, to supply the freshest-of-fresh products. But I’m just starting out and that part hasn’t manifested yet.

Why do you love local food?

For many reasons, but one of them is that I love the idea of eating in season, and our local food follows that. And, of course, to support our local farmers and a local food economy.

Why do you choose organic?

Because it’s healthier for us and for the planet. And my choices, adding to others’ choices, are helping to make changes in our food system. I’m really excited to see these changes happening.

Why do you love Massachusetts?

This year I’ve traveled to a couple of farming states in the west and mid-west. The landscape is beautiful, but seeing monoculture crops and knowing they are grown using conventional methods makes me sad. I like that Massachusetts has smaller farms, and an ever-increasing number of organic ones. An herbalist friend told me that our state is where the northern forest meets the southern forest and there is a lot of plant diversity. Our climate is perfect for growing things the permaculture way and for foraging in field and forest. That excites me. My goal is to learn to use all the plants around me, focusing on local herbalism.

Recipe: DIY Vegetable Bouillon Powder with Dandelion Forest

This blend can be made throughout the harvest season, or with dried herbs that have been dehydrated and stored for later use.  It utilizes vegetables from my garden throughout the season – so there is no waste! – and at the end I have a healthy, non-MSG, soup starter, which reminds me of my garden every time I use it.  Plus, it’s not full of salt, like a lot of the products out there.  (I don’t add any salt to mine, but there is no reason why you can’t.)

Ingredients:

The ingredients are flexible, but I like including greens, carrots, and alliums (onions, garlic) as a base.

Directions:

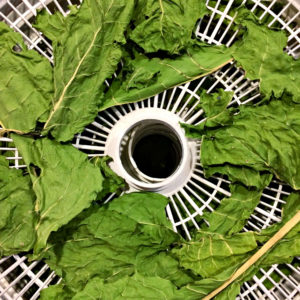
  1. Harvest, wash, and chop your individual veggies of choice into the appropriate format for drying – slice or dice (or in the case of greens, lay the leaves out whole.)
  2. Dry until all the moisture from the plant is gone. I like to use my dehydrator because it keeps the colors vibrant and the nutrients intact. But you could use the lowest setting of your oven or even sun dry (Tomatoes can be tricky; sometimes I grind them then lay them out on a dehydrator tray to dry some more, then grind again). You want everything to be very dry so you don’t get mold.
  3. Powder (room temperature) dry ingredient in a food processor or blender.
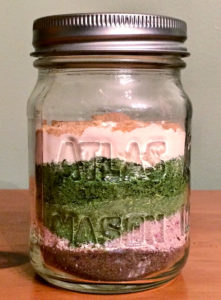
  4. Add individual powdered ingredients to a mason jar during the corresponding harvest season.  At the end of the year, mix everything together in a clean mason jar to create your vegetable bouillon blend. Keep the jar tightly closed so that moisture doesn’t get in on those humid days. (The powder will sometimes cake, but I just break it up with a fork before measuring it out if that happens.)  Hint: if you don’t get enough of some vegetable you would like to have in your bouillon, you can supplement your supply with organic veggies from a farmer or the grocery store. You can also use organic garlic and/or onion spices as a shortcut.
  5. Add salt, if desired. (I usually use add the salt separately when cooking.)
  6. To rehydrate, add 1 Tbs bouillon powder to 1 quart of boiling water. Allow to simmer for 10-15 minutes or until herbs and vegetables are fully incorporated into the water.  Consume as-is, or use as a soup base or flavoring agent for your favorite recipe.

Harvest Hermits

Harvest Hermits

F.O.O.D.  Focus on the Organic Difference
vol. 3  11/2/18

By Christy Bassett for The Organic Food Guide and NOFA/Mass

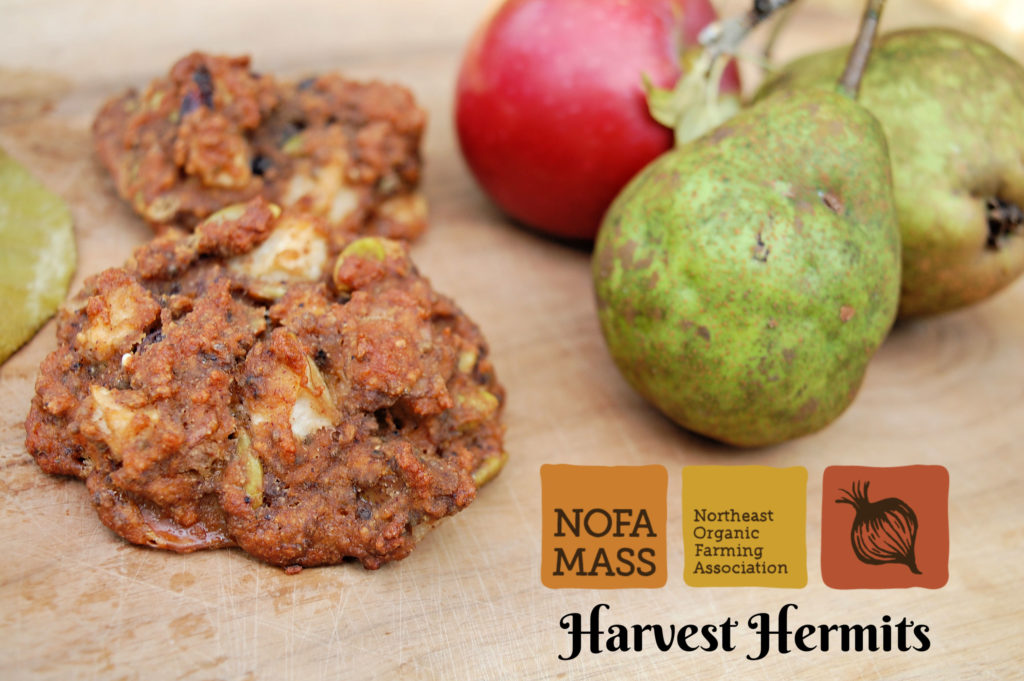
As summer berries become a faint memory, autumn fruits fill the woven wire basket on the counter and inspire ideas of warm apple pie and poached pear parfait.  The spice cabinet seems to call out with offers of warming cinnamon blends to break through the chilled air, and the idea of having the oven on isn’t such a scary thought.

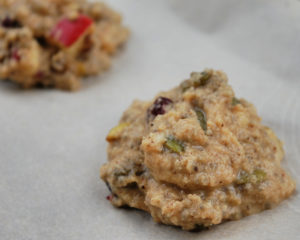
In our home, we try to limit sugar and processed grains, so cookies are hard to come by.  But that doesn’t stop the cravings.  I’ve tried many recipes that replace all purpose flour with almond or coconut flour, but they inevitably coming out dry and crumbly.  That is, until I developed this amazingly satisfying recipe for Harvest Hermits.

“My nostrils smell mommy’s cookies!” my daughter exclaimed after I put these in the oven the other day.  It was, of course, that comforting cinnamon blend that reached her nose even in the other room.  If she’ll eat these real food concoctions, hidden protein and all, I’ll take the recognition for making her smile.

Make these cookies in October or November, when apples and pears have been picked freshly for storage.  Since these two fruits are listed on “The Dirty Dozen”, it’s especially important to purchase them as organic.  Play the calendar correctly, and you may even be able to find Massachusetts cranberries to add to the mix.

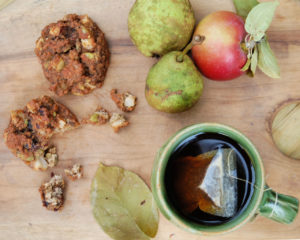
These protein-packed cookies go great with a cup of tea.

Ingredients

Dry ingredients
1 cup organic almond flour
4 Tbs organic coconut flour
1 Tbs organic chia seeds
1 tsp baking soda
¼ tsp sea salt
1 ½ Tbs cinnamon
1 ½ Tbs cloves
1 Tbs nutmeg

Wet ingredients
2 Tbs organic milk
1 Tbs organic butter, melted
3 Tbs maple syrup
2 organic eggs
1 ½ tsp vanilla extract
2 tsp organic raw apple cider vinegar

Additives
1 cup diced organic apple
1 cup diced organic pear
½ cup shelled pumpkin seeds or chopped nuts of your choice
½ cup diced cranberries or raisins

These cookies don’t expand much during cooking, so they can be placed fairly close together.

Directions

  • Preheat oven to 350 degrees F
  • Combine dry ingredients in a medium bowl, set aside.
  • Mix milk, butter, maple syrup, eggs, vanilla and apple cider vinegar in another bowl. Add to dry ingredients and stir well.  Fold in fruit and nuts.  Stir to combine, careful not to overmix.
  • Drop by spoonful’s onto a baking sheet lined with parchment paper.
  • Bake for 30-40 minutes or until the center of each cookie is firm.
  • Remove from oven transfer to a wire cooling rack. Once cool, store in the refrigerator for up to 1 week.

Happy Harvest!

Spiced Squash Seeds

F.O.O.D.  Focus on the Organic Difference
vol. 2  10/26/18

By Christy Bassett for The Organic Food Guide and NOFA/Mass

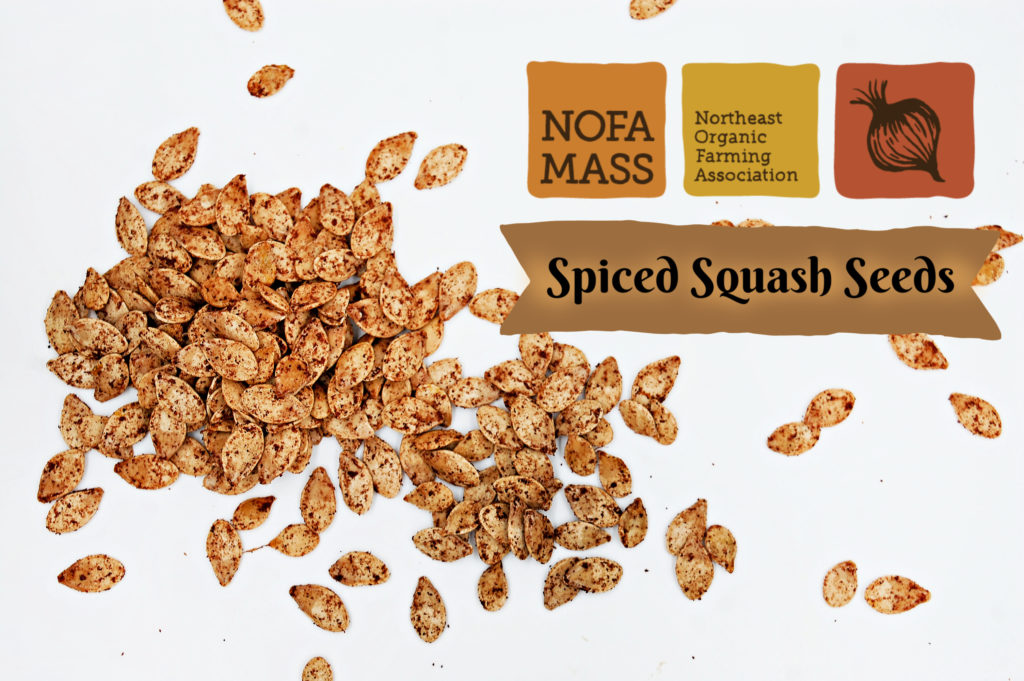
Spiced Squash Seeds

‘Tis the season for sitting by the fire while two halves of a homegrown winter squash bake in the oven.  Harvesting the last of the field crops that sit speckled on the ground, after frost has touched and wilted their leaves, feels both heroic and dismal.  These final trophies of a full season in the sun, battling uncooperative weather, ravenous rodents, persistent pests and strangling weeds, represent the end of a chapter in the short growing season of New England.  Relief.  Gratitude.  Rest.

We cart the squashes to our root cellars, imagining the full bellies that they will bestow in the cold months ahead.  Their sweet flesh is perfect comfort food as a part of family meals, festive gatherings and simple side dishes.

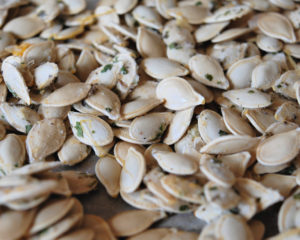
But don’t (you dare) forget about the seeds.  Squash seeds are highly nutritious, packing plenty of protein, healthy fat, fiber, antioxidants, iron, zinc and magnesium.  They are the perfect crunchy snack to take on a road trip, pack into a picnic lunch, or add as an enhancement to a wholesome soup or salad.  And if they’re grown organically, and processed without artificial flavors or preservatives, they can be an extremely healthy replacement for commercial chips or convenience snacks.  Try them with sweet or savory spices to compliment your mood.

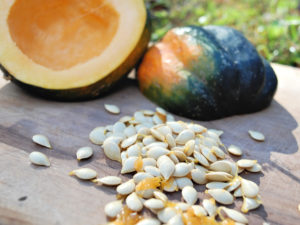
Acorn squash have especially delicious seeds.

Ingredients:

1 ½ cups organic pumpkin or winter squash seeds

1 Tbs organic leaf lard, melted (or other cooking oil as desired)

1 Tbs organic spices of choice (variety suggestions below)

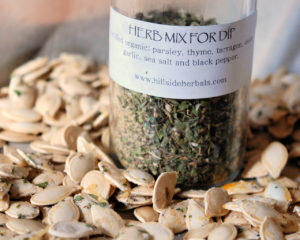
I used Hillside Herbals “Herb Mix for Dip” along with sea salt for a savory seasoning that really solved my snack cravings.

Flavor Varieties

Salted Herb:

¼ tsp parsley

¼ tsp thyme

½ tsp onion powder

½ tsp garlic powder

1 Tbs Sea Salt

Pumpkin Spice:

1 Tbs organic maple syrup

1 Tbs pumpkin pie spice (cinnamon, nutmeg, clove, ginger)

Better (and healthier) than crackers or croutons.

Directions:

  • Separate seeds from squash pulp and rinse through a strainer. Place clean seeds on a towel to dry overnight, or as long as is needed to remove excess moisture.
  • Preheat oven to 350 degrees F.
  • Once seeds are dry, place seeds into a large mixing bowl.
  • Melt leaf lard in a cast iron skillet over medium heat and pour over raw seeds, stirring quickly, as the lard will harden as it touches the cool seeds.
  • Sprinkle with desired seasoning and stir well to coat all seeds.
  • Spread seeds in an even layer on a baking sheet, lined with parchment paper.
  • Bake for 20-30 minutes or until seeds are well toasted, turning once or twice.
  • Remove from oven and allow to cool. Store in an air tight container.

Blueberry Kale Smoothie

Blueberry Kale Smoothie

By Christy Bassett for the Organic Food Guide and NOFA/Mass

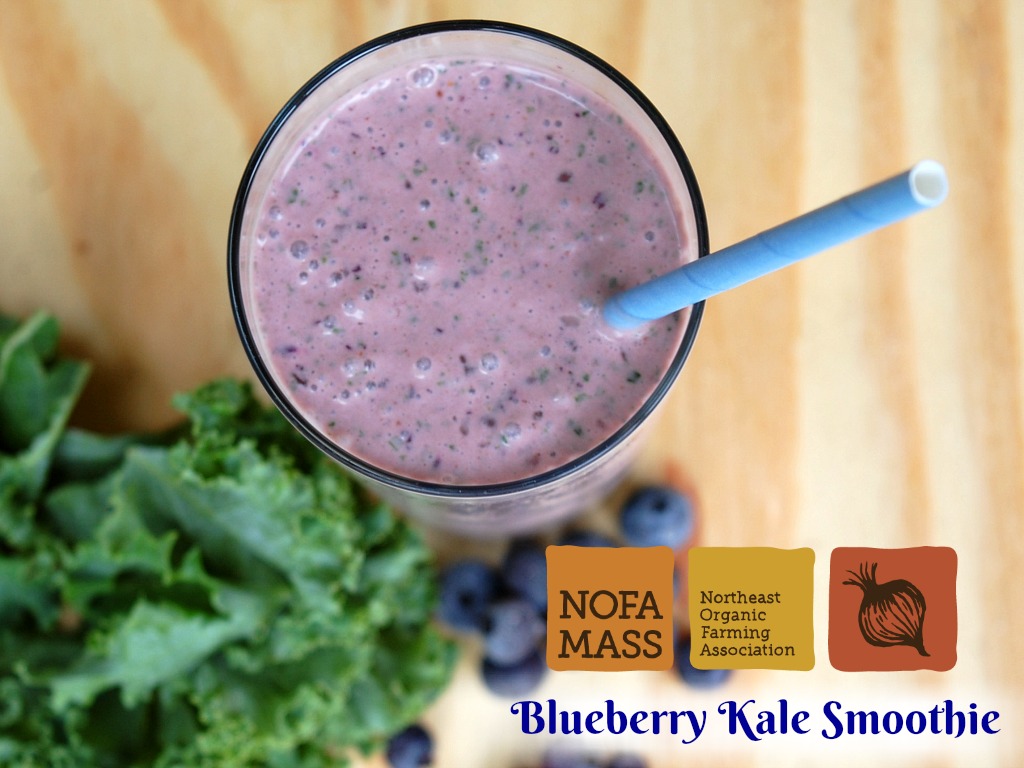
Blending nutrient dense superfoods together can only make them better.  Well, at least in the case of fruit and yogurt it does.  On days when you don’t have time to construct a complete meal or to sit down at the table to savor the flavors of farm fresh ingredients, this blueberry kale smoothie delivers the brain food you need to keep you going.  Blueberries are referred to as a “superfood” due to the high level of antioxidants found in their nutrient profile.  Add in the kick of vitamin C and vitamin K that they pack, and it’s hard to say no to just a few more berries in your breakfast.
Read more

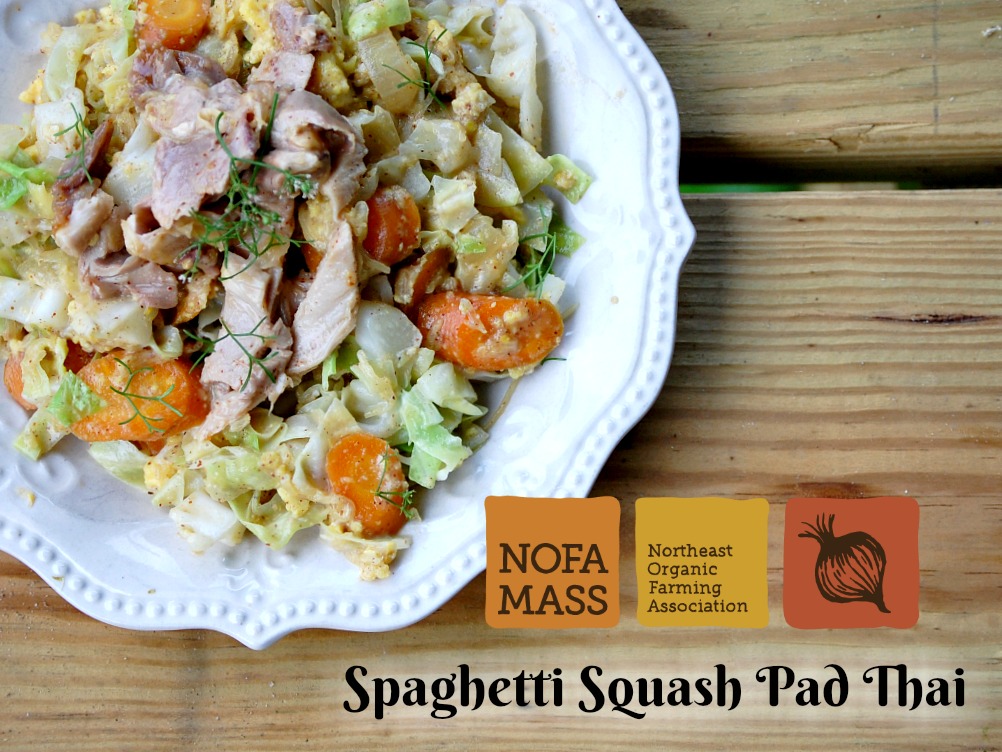
Spaghetti Squash Pad Thai

By Christy Bassett for the Organic Food Guide and NOFA/Mass

As a mother I am always looking for ways to sneak more colorful, nutritious, vegetables into our meals.  My kids aren’t as picky as some are, but they can spy a leafy green from a mile away and give me the side-eye if they notice an extra portion of broccoli on their plates.  They are good sports though and will usually still polish it off in order to get to dessert.  But when I can make a meal that they actually enjoy while using a huge amount of produce from our summer garden or CSA share, we’re all ecstatic.  This New England grown version of creamy, nutty Pad Thai fits the bill.

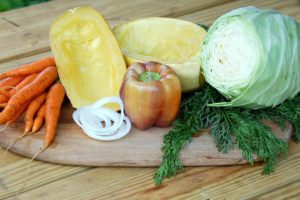
Mid summer is the best time to make recipes that require a variety of fresh vegetables

Ingredients

1 large organic Spaghetti Squash

1 lb organic pastured chicken, roasted and chopped or shredded

2 organic onions, chopped

1 cup organic carrots, sliced

1 organic bell pepper, chopped

2 cups organic cabbage, shredded

4 organic pastured eggs

½ cup peanuts (or almonds or cashews)

½ cup green onion, chopped

Cooking oil (organic pastured lard or organic virgin coconut oil are both lovely)

Fresh cilantro for garnish

Pad Thai Sauce Ingredients

2 Tbs peanut butter (or almond butter or cashew butter)

2 organic chile peppers, sliced and seeded (leave some seeds if you prefer spicy food)

2 cloves organic garlic

½ tsp sesame oil

½ cup organic coconut aminos

1 tsp fish sauce

1 Tbs rice vinegar (white vinegar or apple cider vinegar will work also)

1 small piece organic ginger root, peeled and grated

3 Tbs organic grass fed cream or coconut milk

Salt to taste

Lay roasted chicken on top for more eye appeal

Directions

  1. Preheat oven to 400 degrees. Halve the spaghetti squash lengthwise.  Scrape seeds from the squash.  (Chickens love these if you don’t want to put them in your compost pile.)  Place both halves of the squash face down on a baking sheet lined with parchment paper.  Bake for 45-60 minutes or until fork tender.  Remove from oven and allow to cool.
  2. Prepare the pad thai sauce by placing all sauce ingredients into a food processor and blending until smooth. Set aside.
  3. Using a fork, shred the inner squash fibers away from the outer skin. Set aside.
  4. In a large wok or sauté pan over medium heat, cook the onion, carrots and cabbage in 1 Tbs. cooking oil until well browned. Add bell pepper and cook for a few more minutes until tender.  Push vegetables to side of pan, add eggs to free side of pan and scramble.  Mix together.
  5. Add pre-cooked chicken and shredded spaghetti squash to pan to heat. Toss with prepared pad thai sauce.
  6. Garnish with green onions, peanuts and cilantro.

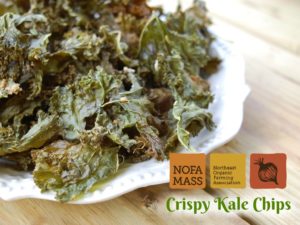
Crispy Kale Chips


 By Christy Bassett for the Organic Food Guide and NOFA/Mass

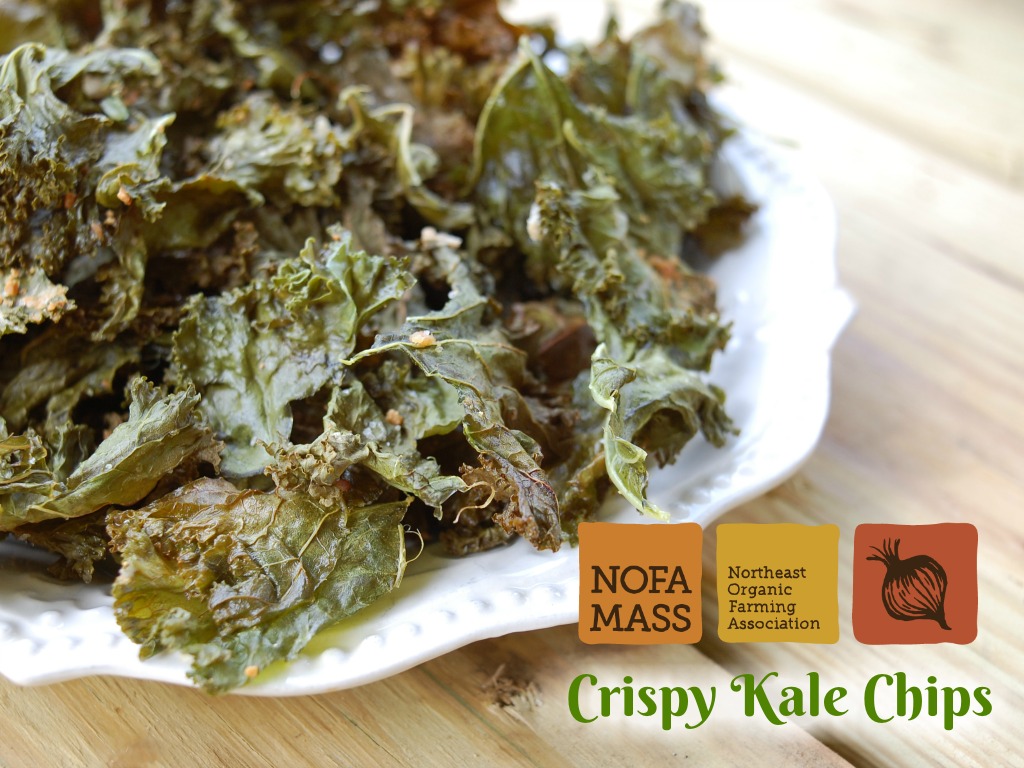
Eat more kale.  Because that’s the only way you’re going to get through the never-ending supply of these leafy greens that just keep on giving.  The many varieties of kale, as well as it’s cold hardiness and extended productivity, make this a vegetable that is available almost year-round in Massachusetts.  One of my favorite afternoon snacks is kale chips.  They are so versatile that they can be seasoned with just about anything in the spice rack to satisfy the person who likes variety but also likes to use that bottomless refrigerator drawer (or garden bed) of kale.  Experiment with garlic & Parmesan, rosemary & sea salt, or even chili & lime juice as added flavoring.  If you’re making it fresh from scratch at home, there are no worries about artificial additives or preservatives, so the only limit is your taste for adventure.

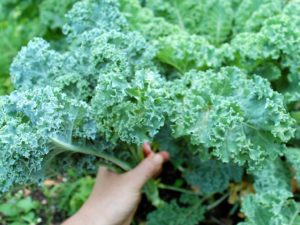
For the freshest, crispiest kale chips harvest straight from the garden or farm stand

Kale Chips

Ingredients

1 Bunch Organic Kale

1 Tbs Extra Virgin Olive Oil

1 tsp Sea Salt

Optional: other seasonings (such as garlic powder, chili powder, dried herbs, parmesan, etc.)

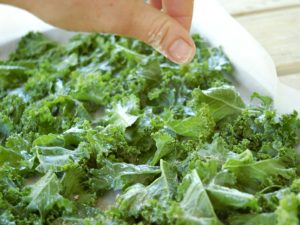
Use as much or as little seasoning as you like

Directions

  • Preheat oven to 350 degrees F
  • Line a baking sheet with parchment paper
  • Remove stem from leaves of kale. Rip or cut leaves into bite sized pieces, rinse in a colander, shake dry and place into a large bowl.
  • Toss kale pieces with olive oil and then spread onto baking sheet.
  • Sprinkle salt or desired seasoning on top.
  • Bake for 10 minutes, flip, bake for 5-10 minutes more until crispy but not burnt.
  • Remove from oven and cool on tray. Store in an airtight container for snacking.

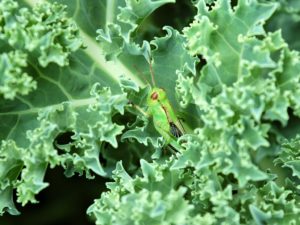
Always double check your organic produce for stowaways before cooking